|
(a year of Bow Drill experimenting) ... updated 12th Oct 2017 I learnt the bow drill a few years ago and in 2016 I did lots of experimenting with the bow drill so I thought I’d write a piece about my experiences. I am wary of people who say "you must" or "should" do it this way or that way, and those who say there is only one way. As with anything, there are usually many ways of achieving a result and that is the same with friction fire methods. So I try to say what I prefer to do rather than what you should do…. of course, there may be more efficient methods of achieving the same result, but also a lot comes down to personal preferences and what works for you, rather than what works for me! Efficiency and speed may not always be as important especially as part of ritual - where awareness and deliberation may be more important and the choice of wood may be more down to it's perceived sacredness (e.g. Oak) rather than it's efficiency! And with ritual, a bit of theatrics adds to the suspense so it may not be so important to get it right first time, the 3rd time however can be seen to be quite ritually symbolic! However in a survival situation, speed and efficiency may become more important. I do try to use awareness and be methodic in my practices, as rushing usually sets me back. So friction fire.... In short, the main aim of fire by friction is to create an ember\coal by rubbing two pieces of wood together to create dust which collects together, heats up, and ignites to form an ember which is then used to light a tinder bundle. The two main forces required to produce friction are the downward pressure of one wood on another and the speed they are rubbed together. The more pressure applied then the more friction will be produced, similarly the faster the wood is rubbed (with pressure applied) then the more friction However, too much pressure\speed may also have a hindering effect, so it’s about learning and experimenting what works best. Also, concentrating the friction (and dust) in one place increases the efficiency, which is why the spinning of a spindle (hand drill, bow drill, pump drill) can be more efficient than push\pull methods (fire plough, fire saw) however the fire plough and fire saw can be effective using the right woods under the right conditions. The fire plough is commonly used in Australasia\Polynesia as the climate and some of their native woods are suited well to the plough, and in Asia the fire saw is commonly used as there is loads of bamboo! 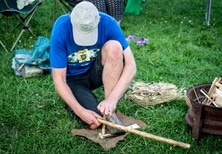 For now, I will focus on the bow drill since this is where I’ve experimented the most. The bow drill, uses the spinning of a spindle (drill) into a piece of wood, by use of a bow to create friction. A bearing block is held at the top to allow the spindle to spin and pushed down to create the downward pressure. There are a few factors that I think affect the efficiency of the bow drill: Number of spins per stroke of the bow Each time you change the direction of the spin i.e. changing the stroke of the bow – the drill will stop before spinning the other way. So, the longer it can spin in one direction, the more efficient it will be. There are two main ways to increase the number of spins per stroke: 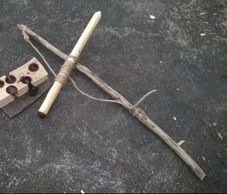 Length of cord\bow – the longer the length of cord (hence bow) then the more spins can be achieved per stroke. The limiting factor of this is the stretch of your arm, which is one reason why some people say to use a bow the length of your arm. Longer bows still work (I've used a 5ft one!), but you may not actually use the whole length of the cord and the bow may become cumbersome making it less efficient. Shorter bows still work too (I’ve used a very short bow) but more strokes may be required than a longer bow. Position of spindle on cord -. With the drill on the inside, it may have slightly less cord to travel before it knocks into the bow. But this may only make a very small difference and some people prefer the drill on the inside and it’s not really an issue if using a curved bow or a longer bow. With a straighter bow, then I prefer if the drill is on the outside otherwise it can knock against the bow. Thickness of spindle – the thicker the spindle then the more cord is used to wrap around and so you will get less spins of the spindle per stroke, so by using a thinner spindle you’ll get more spins. However, if the spindle is too thin it could work against you as it may eat through wood quicker, and could snap under the pressure. I typically use a spindle 1.5cm to 2cm wide but larger spindles can work, they just require a bit more effort and pressure - there will become a point where too much pressure is needed by 1 person to achieve the necessary friction. And I can notice the difference when using a thicker spindle (e.g. 3cm) Friction at the top The spindle is held in place at the top by a bearing block so that it can spin. You want as little friction at the top as possible, so all the friction is at the bottom. Too much friction at the top, will reduce the efficiency and speed and more effort is required to spin the spindle. Top of Spindle - To reduce friction at the top, you want as little surface area as possible hence why the spindle is carved to a point. Bearing Block - you want to try and use a bearing block which causes little friction – hence why some people use stones and limpet shells as they tend to have polished surfaces hence little friction. Wood bearing blocks do work, but ideally you want as hard a wood as possible which will polish off such as blackthorn or hawthorn or holly (other woods are available :) ) If you use too soft a wood, it will start to produce too much friction. Softer wood bearing blocks can work, but just less efficient than a hard wood and may require a bit more effort.  Friction at the bottom To achieve more friction at the bottom, you need to apply more downward pressure onto the bearing block. Using my contraption (see photo), and adding weights I determined that I needed about 15lbs of weight with a 1.5cm hazel spindle and a lime baseboard (and over 20lbs with a 2.5cm spindle) to produce enough downward pressure to create an ember. I’m sure there is probably an optimum amount of pressure which will vary depending on the wood combinations but I’m not going to get that scientific! I was just playing around - basically you may need to experiment with how much pressure you need to apply depending on woods, bearing block and drill size - If the drill is squeaking, no smoke, or dust too light brown then apply more pressure. If you are having difficulty spinning the drill, or dust is chunky then try less pressure. The downward pressure can be affected by a few things: Your stance – shifting more of your body\weight over the bearing block can help produce more downward pressure. Also locking your arm around your leg to prevent the drill wobbling will help concentrate the pressure downwards. But this is also about personal preference and what is comfortable. 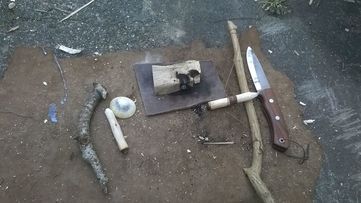 Length of the spindle – the longer the spindle the more distance the pressure has to travel down the spindle, and also the longer the spindle the less pressure you may be able to apply due to posture. On the contrary if you have the spindle too short, then it may become harder to apply the downward pressure and keep the spindle stable. I have used a 8cm spindle but my hand ended up resting on my shoe and I found it hard to apply the pressure and I was also nearly doubled up – but it did work in the end. Again with spindle length it comes down to personal preference – my spindles are typically about 15-20cm but I have used longer and shorter successfully. Personally I prefer a spindle where I can lock my arm comfortably around my lower leg for more stability. Thickness of spindle – the thicker the spindle at the bottom, then the more surface area is in contact and you will find more downward pressure is needed, and there will become a physical limit of how much pressure you can apply. The thinner the spindle, the easier it is to apply the pressure and spin the spindle, but as before it may eat through the wood quicker , more prone to snap and you get a smaller ember (but size doesn’t always matter!) As before I prefer a spindle 1.5 – 2cm. The wood – the choice of wood can affect the amount of pressure needed. Harder woods require more pressure than softer woods. If the wood is too soft then try less pressure, but I tend to avoid very soft woods and prefer medium hardness – i.e. you can make an indent with your finger nail. However, I have successfully used English Oak so hard woods can work they just need a lot more downward pressure! The drill is typically harder or same hardness as the base board, however I’ve used Hazel on Oak successfully. Tightness of cord (added 2018) - I also think the tightness of the cord can affect the downward pressure - with a very tight cord I think it can help in adding more downward pressure (I guess due to gravity) - I have noticed that when the cord is slacker you need to apply a lot more downward pressure than when the cord is very tight. Speed The speed at which you spin the drill also makes a difference but this can also depend on the amount of pressure. You don’t need to go like crazy, a steady pace can work, and with more downward pressure you may find you don’t need to go that fast, increasing speed towards the end can help. There probably is an optimum speed depending on type of wood used, but again this is all about experimenting and what works best for you. A few things can affect the speed: Tightness of cord – the tighter the cord then the more grip the cord has on the drill and it is easier to spin the drill and make it spin fast and prevents slippage (which slows down\stops spindle.) I prefer to use 2 twists of cord on the drill rather than one to increase the grippyness (that’s just my preference.) However, you can use multiple twists (8+) with a less strong cord (e.g. jute twine) and this way the cord doesn’t have to be as tight and since there is less pressure on the cord it is less prone to breaking and less prone to slippage due to multiple twists – this method may not be as efficient as using a taut cord (as mentioned above) but still works though you may need to apply more downward pressure (see below clip) Stability of drill / hearth – if the drill or hearth isn’t stable then this may affect speed –try to keep the drill as perpendicular as possible so all energy is going straight down. Locking your arm around your leg helps keep the spindle stable, as does a spindle which is at a good height to be able to do this. Also you may find it more difficult to keep a short/long drill stable. Also ensure you have your foot securely on the hearth, I find it helps having your foot as close to the spindle as possible.If the hearth moves then it can dislodge the dust amongst other things. Bearing block -as above – the less friction at the top then the faster the drill can spin with less effort. Quality of drill – a smooth straight drill with no notches will spin faster – depending on the wood you don’t have to take the bark off – hazel can work well with bark on. It depends how smooth\bumpy it is. I have used wobbly\not straight drills successfully but just not as efficient. Spins per stroke – as above
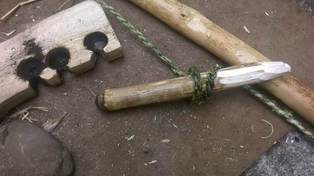
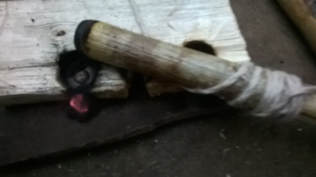
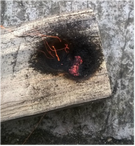
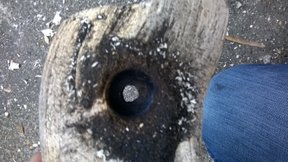
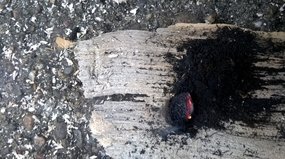
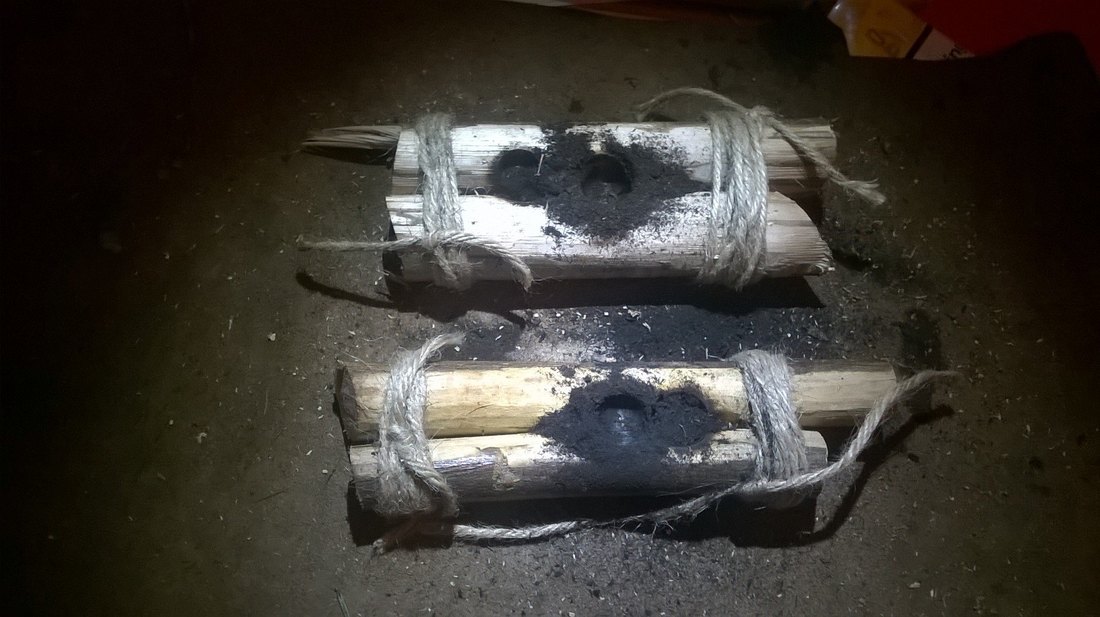
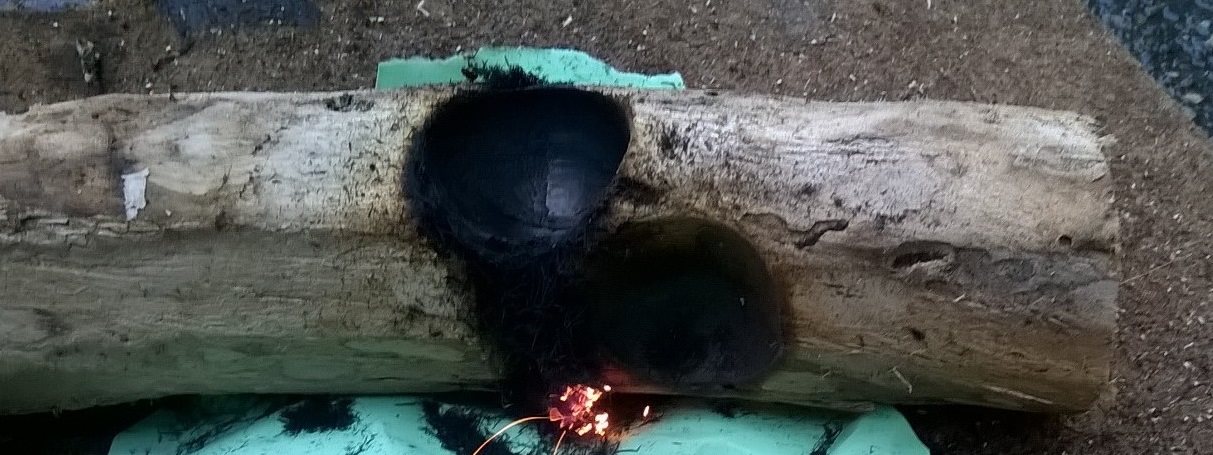
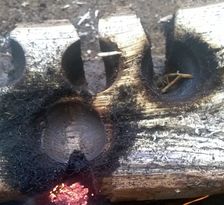 Other factors The notch – in a perfect world, a perfect 1/8th pie slice notch in the middle of the burnt circle finishing just before the centre is most efficient but to be honest I hardly ever make a perfect notch, but mostly they are nearly there! If the notch goes to the centre or beyond, then the spindle will form a nipple and decrease efficiency. Too wide a notch then the less surface area to create friction, and spindle can fall out. Too narrow, and not enough space for dust to form into a pile and it may start piling up at sides so less efficient, so yes do try and get your notch just right but don’t worry if not perfect…. this is illustrated by some poor notches in this photo. No notch! – I’ve not yet had success without using any form of notch the dust gathers round the edge but that’s not to say it isn’t possible, I’ve just not yet got it to work. However, you don’t have to use the traditional notch – a couple of alternatives I’ve tried are – drilling one hole then drilling next to the hole so the dust falls into it. Drilling a thinner hole half way through on one side, then drilling over top of it on other side with a larger drill – an ember forms inside the hole. Another method is tying two straight branches together and drilling in the groove formed in the middle – 2 embers can apparently form either side (see below.) However, I've not yet had success with it, so far I've tried hazel, willow and ivy. I find the drill polishes very easily and have not yet had success in creating an ember. I have drilled into the top of a uncarved branch (see below right), but a notch was required, but this also proved that you don't have to have a traditional flat board - there are lots of different ways! Keeping bow straight - keeping bow parallel to ground will help keep cord in the same place on the drill , preventing cord from moving up\down and potentially snagging\coming off. 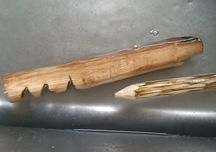 Dryness of wood – wood which is bone dry will work under friction much quicker than wood which is damp, however damp wood is still possible – it may just take a little longer as the friction dries out the wood. As an experiment I soaked a hazel spindle and ash baseboard in water for half an hour and still managed an ember. It also depends on the type of wood – I’ve not got anywhere with damp Oak. Quality of wood – I have found dead not green wood which hasn’t started to go punky works the best for me. I’ve not had success with green wood, but have had success with punky sycamore.... You can quickly season green wood over a fire or in oven but that's not much use if you’re in the wilds! Type of bow – this is probably down to preference - bendy or rigid and curved or straight bows work. With a rigid bow (whether curved or straight) you may need to adjust the cord more to get it tight. With a straight bow you may find it easier if the drill is on the outside of the cord. With a bendy\flexible bow, you can use less cord (a little bit longer than bow) and flex the bow to get enough slack to twist around the drill and use the flexiness of the bow to tighten the cord – this can also help with cords which tend to stretch as the bow will straighten and tighten with the cord. You just need to makesure the bow and cord is strong enough under the pressure. I’ve tried all types of bow, and have found all work, though as noted earlier smaller bows are less efficient (but can still work.) However, for efficiency you may find it easier to use a bow which isn't too heavy or cumbersome and is easy to hold , you may find a straighter bow is easier to use than a bendy bow - again it's down to what works best for you. I've not really tested the efficiency of bows but I would probably say a lighter , straighter bow is more efficient as easier to use. Wood Combinations – Ask 100 bow drillers what their favourite\usual combinations are and you’ll probably get lots of different answers! I say ignore those who say you must use the same wood for both drill&board or from the same tree – this is not true and limits your choice! Yes if you are lucky to find a piece of dry dead standing wood which you can use for both the drill and board then brilliant, go for it, but you don’t have to and can use different woods or same wood but from different trees\branches. I have! And I’ve found some woods don’t work too well on themselves e.g. Ash but there are others who do use Ash on Ash so may depend on stage of seasoning\quality. In most UK native woodlands there are a wide variety of trees, and hopefully you should be able to find wood suitable for the drill and board. I prefer to use wood which requires less work if it’s available, so tend to use hazel for the drill as there’s lots of it in my local woods and grows straight and in the desired thickness with little work but that’s my preference . Here are a few combos I’ve had success with: willow on willow, hazel on willow, willow on ivy, hazel on lime, hazel on ivy, hazel on hazel, hazel on ash (though Ash can be fickle!), hazel on birch, birch on birch, hazel on pine, hazel on oak, oak on oak. There are more though! I tend to find hazel on lime\ivy\popular the easiest but others may disagree! What is fascinating is that the ancient greeks were writing about this very subject over 2000 years ago! See this post here about Theophrastus Enquiry Into Plants where the Greek botanist writes about the best woods for the fire drill!
Conclusions
Ok so I may have confused some people, as I've shown that there's many ways of achieving an ember, ok so some may be less efficient than others, but I also feel it's also down to personal preference and what works for you.... Now I could conclude that the most efficient method is ...... but I'm not going to! And lastly…I like to learn and gain knowledge from others and experiment with the gained knowledge to see what works for me, and share my experiences with others - and I’m still experimenting and learning ... For me fire by friction is a journey and I've still lots to learn….. Comments are closed.
|
Archives
January 2024
Categories
All
|

 RSS Feed