|
Over the last week, I've been reconnecting with the Hand Drill, and I've been pleasantly surprised at how easy it has been to get back into it since it has been a while, and in the past it has been a love hate relationship!
Having some good dry pieces of Clematis for the hearth and some nice straight Teasel spindles helps, as well as having a few years of (on-off ) experience of the hand drill. My preferred stance is to kneel using a longer piece of wood (which I kneel on) to hold down the hearth. It's also about "feeling" the spindle in the hearth, to feel if more of less pressure is needed, and to relax into it and not get frustrated, but to just keep practicing! 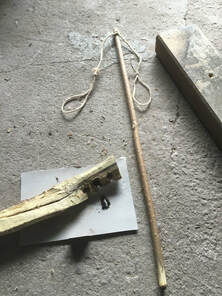 Today, after quite an absence I decided to pick up the Hand Drill again. Since it has been a while (a couple of months), my hands and muscles weren't very conditioned. I decided to use thumb loops. Thumb loops are basically an aid to the hand drill to prevent your hands from moving down the spindle. I use very simple thumb loops by tying a loop in each end of a piece of cordage (this is Jute) and tying the cordage around the top of the spindle. You do want each loop to hang at least 6 inches , otherwise I find it restricts movement of your hands. You place each thumb through a loop and then rotate the spindle between your hands, as per usual for hand drilling, applying downward pressure as you spin. The thumb loops keep your hands in the same position. It can take a bit of trial and error to get the knack of it and there have been times when I've found it easier without! It is a much under-used aid within the bushcraft community, I think a lot of people frown on it as cheating but for me it is just another aid, and you still need to learn and understand the principles of the hand drill to succeed with it. I do prefer to be able to Hand Drill without Thumb Loops but at times it can be a useful tool in the box, and can aid learning and aid in conditioning your hands\muscles (as you can usually go for longer as thumb loops are not as tiring as moving your hands up and down the spindle.) Oh this is good... I think this may be the oldest surviving evidence of friction fire. Apparently a 6000 year old wooden Fire Drill was discovered in Canada (Triquet Island , BC) in 2016. Click here for an article in The Vancouver Sun which is showing a photograph of the ancient spindle, but it is lacking information which is surprising as this is quite a find! For me , this is fascinating - the oldest fire drills I am aware of are from China (approx 2500 yo) and Egypt (approx 4000 yo).
There is this paper I have found by Alisha Gauvreau and Dr Duncan McLaren from the Anthropology Department, University of Victoria (B.C) working on the Hakai Ancient Landscapes Archaeology Project - which states that the "Fire Drill" was found in the peat layer which is between 6,726 and 6,674 years old but that's it! I'm surprised there isn't more information on it as it is an amazing find! I'm trying to find archaeological reports for the Triquet Fire Drill but I've not found any yet .... but I'm enquiring with the Hakai Institute - watch this space! It also raises more questions, such as:
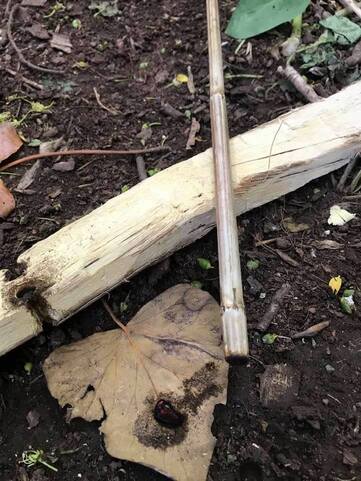
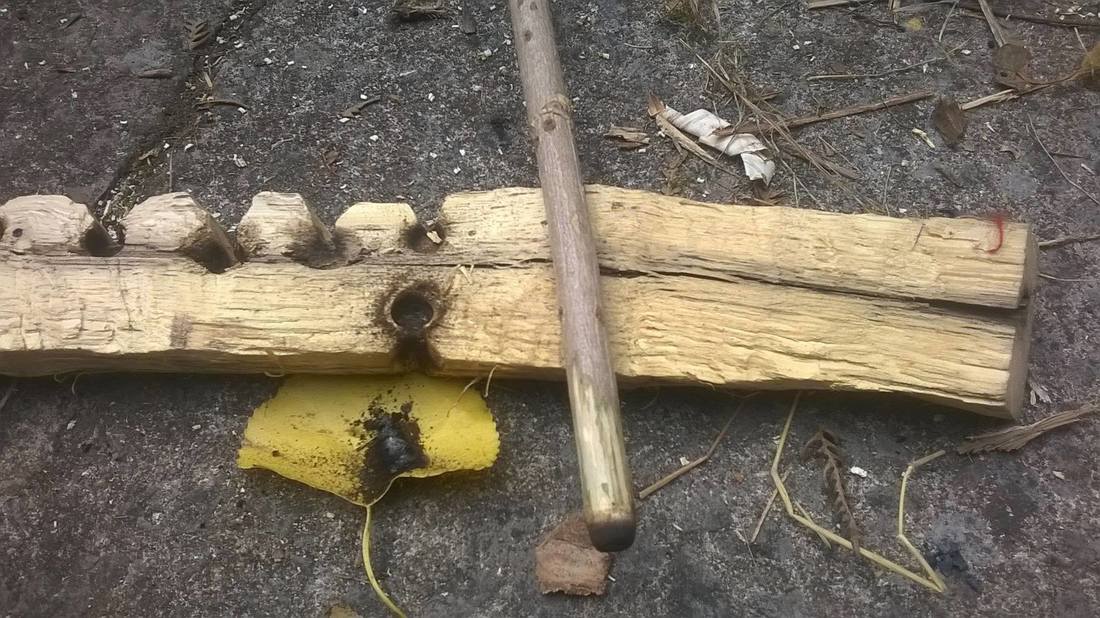
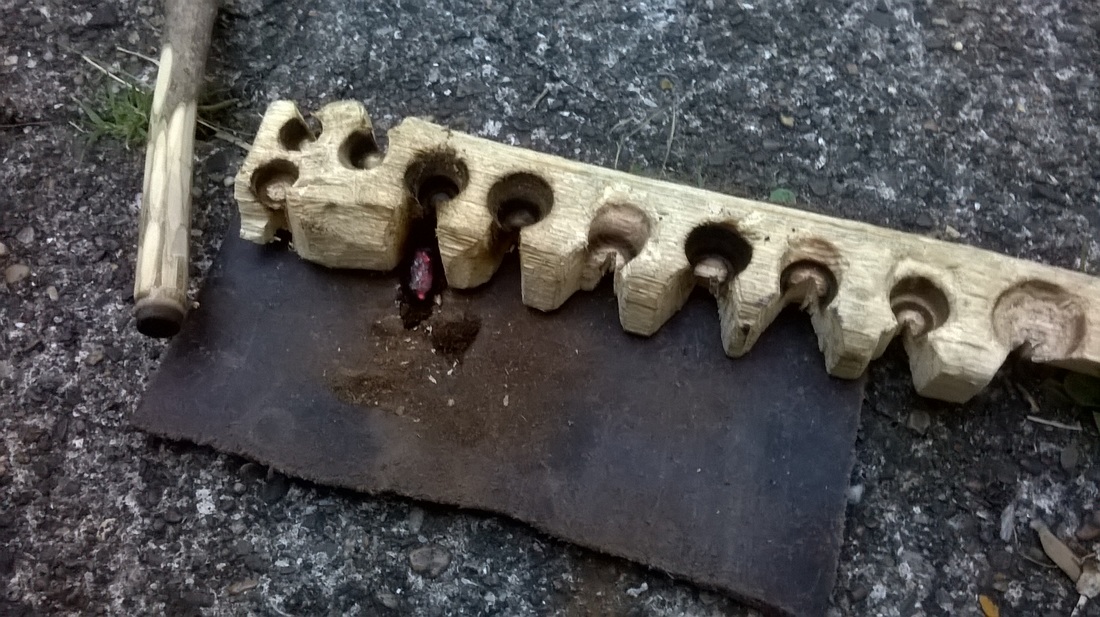
The Ancient Triquet Village is one of the oldest settlements discovered in North America (approx 14000 years old) and I found this statement fascinating “It appears we had people sitting in one area making stone tools beside evidence of a fire pit, what we are calling a bean-shaped hearth” (Alisha Gauvreau) .. re-affirming the fire being central to human activity. The other amazing thing about this is that the team based their search on oral stories passed down through generations that this Island had been populated during the Ice Age which alot of people discounted. Link to the article: https://vancouversun.com/news/local-news/heiltsuk-first-nation-village-among-oldest-in-north-america-archeologists The hand drill , is the method I find the most profound , and more akin to a spiritual practice, as it is just you and your hands welcoming in the fire. It's also one I have had a love and hate relationship with, though I do seem to be starting to relax more with it. I decided to pick it up again last week after having a break for a few months and I happily discovered that I was able to welcome an ember using a slightly different technique. I used a longer spindle and knelt rather than sat, and used a piece of wood to weigh down the hearth board to stop it from moving and after only a little while I was blessed with an ember. And a few days later , I was successful again so this way does seem to be better for me - you can apply more downward pressure but it does need a longer spindle. The woods used were Elder spindle and Clematis hearthboard. I also leave the bark on the spindle (except for the bottom) as I find it helps with grip.
I personally think that is one of the main messages to give when learning friction fire or anything for that matter. If you really want to master it, then you need to keep practicing, experimenting, further your knowledge and learn from others. It is harder nowadays to learn "old" skills as the skills aren't passed on down from generation to generation anymore, so it's starting from scratch but learn from others, review what you are doing and keep trying.
Today I managed 2 embers with the hand drill but I know that the next ember may not be as easy. I put a post on the Primitive Fire UK Facebook page, and acted on some tips. I had success today, but I know I need to remember what I did right (and wrong) and learn from advice given by others. I need to source some more spindles, a little bit thinner and practice on the technique to try and use more of my hands, and as one person said "relax into it!" Keep going, and you'll get there. As can be seen here, I say a little thank you at the end and remember my ancestors - for me it's more than just a means to lighting fires. Everyone learns friction fire for different reasons, and that's all good! On 19th July (Day 41 of hand drill practice) , I successfully created my first ember using the hand drill without using any thumb loops! I used Elder spindle on Clematis hearth, and I managed to create 3 embers in total that evening, without much effort. I thought I had cracked it! But it took me another week of practising everyday until I could get another ember which was on 25th July. For this ember, I used (what I think is) Willow (which I found in the car) on Clematis and again I created the ember without too much effort in a few minutes.
But I don't seem to be getting consistent results, and so I'm trying to figure out what is different on the times I don't get an ember as the woods are the same, and my technique is the same (or I think it is!) Is it the notch (width\depth)? Is it the humidity? etc I've not figured it out yet, but I'm on the right track and it feels amazing to be able to create an ember by just using your bare hands and two pieces of wood, and the hand drill makes me feel connected to our ancestors. As per my earlier post, I started to learn the hand drill a few weeks back. What I soon learnt, is that there isn't room for imperfections with the hand drill, unlike the bow drill where you can sometimes get away with cutting corners (once you've learnt it.) With the hand drill, the type and condition of the wood needs to be just right, and the pressure and speed in which you spin needs to be just right. The thickness of the spindle also makes a huge difference.
On Thursday (14th July) after many attempts and trying various things including crumbled King Alfred's cake\cramp balls (which didn't work., I then tried once more using thumb loops on a new hole and amazingly I got an ember. I was ecstatic and was on a high. I thought I had cracked it! Since then, I haven't managed another ember. I realised that there is no room for complacency! You need to be always thinking, reviewing your setup, being connected and aware. I then noticed my Elder spindle had worn down and had gotten thicker which means more surface area and so requires more pressure and speed. Also, on that final go, the end of the spindle had got nicely charred and hot so that maybe helped too. I am now trying a new thinner Elder spindle but still no ember (yet) - I am getting smoke and brown dust and this most likely infers that I need to apply more pressure. So it's also made me realise that I'm not there yet, and still have much learning and practice to do, however the first ember has given me the motivation to carry on. I'd also like to be able to crack the Hand Drill free-hand without using thumb loops. At the moment, the thumb loops are helping me learn how much pressure I need to apply, and I can then try to emulate that free hand. I'm also not quite there with my strength so I need to keep at it, to strengthen my arms so I can go for longer and apply more pressure. With friction fire, there is also more to learn, and I'm still learning with the bow drill as well! I've now decided it's time to learn the hand drill. I've been doing it for a week now. The first challenge is sourcing the right wood - from reading various articles Elder (as in elderflower) on Clematis is one of the best combinations in the UK. to start with There are many Elder trees near me but I've yet to find the perfect branch which needs to be about 15mm in diameter and as straight as possible and with little pith in the middle. Luckily my local woods have clematis but I've yet to identify it as Clematis Vitalba (only one native to uk) as the leaves are high up in trees. The Elder branch I'm currently using has too much pith (side walls are too narrow.) So I do need to do some more foraging! At the moment I'm focussing more on conditioning my hands (very important) and muscles and learning the technique so not too hung up that my materials aren't perfect. I'm just doing a few minutes practice a few times a day - mainly since I'm finding it exhausting and it tires my arms out! I And it is important to bed your hands so main reason for only a little practice each day - I've got one blister so far! I've only just started so am just getting to grips with it. I'll post updates and any tips\pointers as I progress! I've linked to a some articles and YouTube clips on the Links page, which I'm using to get started. So I won't repeat what they say as they are the experts rather than me! However, a few things I've learnt so far from various sources: •Position (updated 22Jun)- all the clips and articles I read showed people in a sitting position. I have found that I can't get enough downward pressure when sitting. I then tried a few various positions but still couldn't apply enough pressure. I then found an article which recommends either the shortened bow drill position or kneeling in prayer position but with upper leg extended (not resting on calves) - this allows you to apply more downward pressure. I am now trying the kneeling position as I find the shortened bow drill position too uncomfortable and can't move far enough down the drill. •Point elbows down and use them to apply downward pressure •Spindle needs to have thick side walls and as little pith as possible. •Thumb loops can help when learning to understand downward pressure needed - I'm alternating with \without thumb loops as I don't want to get dependent on them (it's basically bit of string tied to top of drill with a loop either end to place thumbs in so you can apply downwards pressure without your hands moving down!) •Start from top and when hands get so low that you can't apply as much pressure move back to top quickly - hold drill firmly down with one hand whilst you move other hand to top. •I'm experimenting with how I spin the drill with my hands - will update once I've cracked it But by pointing hands upwards and elbows down I seem to get more downward pressure...... •The longer the drill the better so you have more time before having to move up again. Preferably at least 3 feet •Diameter of drill - from reading different articles people seem to use between 6mm to 15mm in diameter at the business end . The smaller then the easier it is to generate friction to smaller surface area but the smaller the ember. I have now started to use smaller drill but you then get issue of thinner side walls. Update 8th-Jul: I did start getting smoke from using Teasel but side walls very thin so not able to create an ember. •The straighter the drill the better! •Keeping bark on drill helps hands to grip ( due to sweat etc) •Spitting on hands and rubbing hands together helps apply more pressure on the spindle. (This does actually make some difference) Update 20th June: Still not getting very far - after a few minutes my arms feel like they will drop off and still not getting much heat at all. I've tried Elder on Clematis using the bow drill and I get smoke within seconds (almost instant) so I know those 2 woods do work well. I'm just not applying enough downward pressure with the hand drill. I will keep up with daily practice to build up my muscles! I'm now trying an Elder plug (which seems to be of right thickness and deadness) on the end of a nice straight drill, to see if that'll help as I can't yet find the perfect drill which is long enough, straight enough, right deadness and thickness of walls! Sourcing the right materials is always the first challenge with friction fire, and the had drill is more fussier than bow drill! Due to my arm weakness, I think this will take a while! Update 22nd June: Still can't get enough downward pressure and not getting very far. I have felt like giving up but now I am trying different positions to shift my body weight over the drill. Downward pressure is very important and so if you don't have very strong arms (like me) then you need to use your body weight as well. Lets see if this improves things! Update 8th July: I had a few days off as I was getting a bit bored. After reading a few more articles I decided to try with a smaller diameter spindle and swapped to Teasel. I started to smoke and dust quite easily but due to the teasel being quite old and spunky that's as far as I got. The key with hand drill is having a perfect kit. With the bow drill youo can get away with not everything being perfect but the hand drill is more particular. Due to it being summer, I wil have to be patient and wait till autumn when things start dying off before I can harvest. My other annoyance s that I still can't go for very long before my arms give in, which is limiting the amount of practice I can do. I will continue practicing with my imperfect materials to work on technique, knowing it may take a while. I'm very impatient! I have heard some people practising for an hour a day for 5 months before they got an ember - hopefully I wont take as long as I don't think I have the patience! Combinations that have worked for others:
•elder on clematis (vitalba only native clematis) - seems to be most common for learning •teasel on clematis - There is lots of Teasel near me but it is mostly dead standing from last year so too punky. I will wait till this year's crop dies off before harvesting. •mullein stalk on clematis •cat tail (bulrush) on clematis •burdock stalk on clematis •ragwort stalk on clematis •cat tail on ivy •elder on ivy •budleia (non native) on willow •teasel on burdoch •cat tail on teasel •willow on willow •other base boards - lime |
Archives
January 2024
Categories
All
|

 RSS Feed