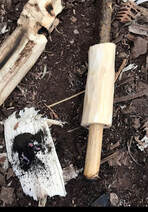
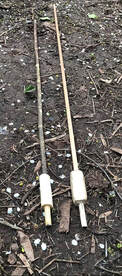
The Hand Drill
(updated October 2023)
I find the hand drill a primordial spiritual practice as it is just my hands, and 2 pieces of wood coaxing the fire out . You don't need to use it just on your own - you can do it with others taking turns
The Hand Drill consists of a longer thinner spindle than Bow Brill and 8mm-12mm ish in diameter which is spun between the hands into a hearth board, which through friction creates dust that heats up and hopefully is ignited by the build up of enough heat to coax ember into being. The bow drill was most likely a technical enhancement of the hand drill and the hand drill is simpler in technology, yet it can take some people (like me) longer to learn the hand drill than the bow drill. Whilst others take to the hand drill easier than the bow drill, and learn the hand drill first! (there are no rules :)
I started to learn the hand drill in 2016, and spent a few months practicing daily and it became a practice as I needed to keep my hands and arms conditioned! I thought I would share the knowledge that I have gained whilst learning the hand drill. I am no expert on the hand drill, there are far more people more experienced in the hand drill than me, so these are just a few tips rather than it being a comprehensive guide.
There is one thing that a lot of articles\videos don't point out and that is the amount of time that it can take some people to become proficient at the Hand Drill if using on their own. The Hand Drill is typically more suited to hotter climates and where wood typically has a lower combustion temperature therefore it should be easier to create an ember through friction in those climates. In environments where it is wetter and wood has a higher combustion temperature (e.g. UK) then it can be harder to create fire through friction, and the prevailing method tends to be the bow drill. However, there are usually suitable materials for the hand drill in most places, and more preparation of materials may be needed (drying/seasoning.)
The Hand Drill is possible in the British Isles, you just need to ensure you have dry seasoned materials.
Here are some key factors with the hand drill :
1 - Stance\Posture
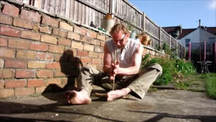
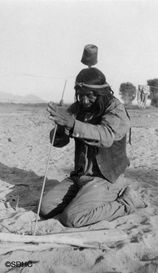
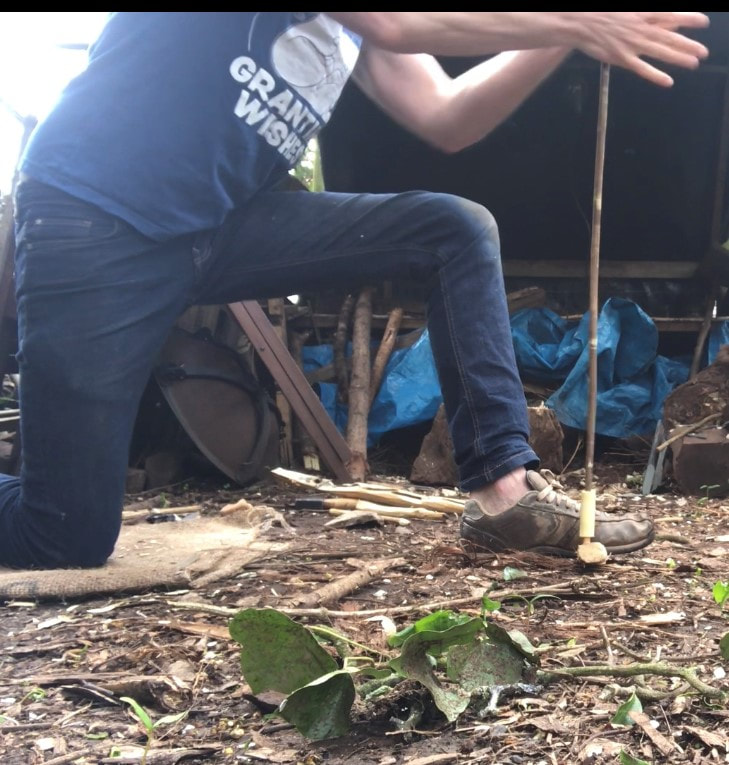
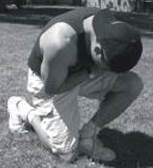
Stance can be important as I have discovered. I had a bit of a eureka moment (in 2018), 2 years after starting to learn the hand drill, by switching from the sitting to the kneeling position. And in 2021 I switched to bow drill stance using longer spindles which is now my preferred way. There are 4 typical positions (and variations of those) ... find the one which works best for you
Stance can be important as I have discovered. I had a bit of a eureka moment (in 2018), 2 years after starting to learn the hand drill, by switching from the sitting to the kneeling position. And in 2021 I switched to bow drill stance using longer spindles which is now my preferred way. There are 4 typical positions (and variations of those) ... find the one which works best for you
a) I started with the seated position as everyone seemed to be dong this but it wasn't comfortable for me, and I found it hard to apply the pressure. I stuck with this for a couple of years but I also found it a continual struggle to coax an ember - it is harder for me to produce the downward pressure in the seated position. Some people do find this position easier and you use your foot to anchor the hearthboard.
b) I switched to the kneeling position in Aug 2018 and very quickly (even after a few months absence) I was able to welcome an ember. You may need to use a longer spindle and I find it best to anchor the hearth board so it doesn't move e.g. place a piece of wood ontop of the hearthboard and kneel on it. Raising your bum off your heels allows you to apply even more downward pressure - you may need to shuffle around a bit to find the optimum position.
c) Bow Drill Stance. I moved to the Bow Drill Stance in 2021 using longer spindles (80cm to 1m) and I am finding this much easier to apply downward pressure and power especially with longer spindles. You also use your foot to anchor the hearth board. This is now my favoured position.
c) The shortened bow drill stance as shown in photo d is supposed to generate the most downward pressure but I struggle with that position, but seem people find it works best for them. Again,a longer spindle may help with that stance.
It's down to personal choice and what works best for you! (not what everyone else is doing!)
|
|
This video demonstrates the Bow Drill Stance which I find a lot more comfortable personally.
|
2 - The condition of your hands and arm muscles
If you have good arm strength and your hands are pretty tough then you may find it fairly easy to learn. However, if like me you have soft hands and weak arms then you may need to practice a little each day. When I first learnt in 2016, I finally got my first ember on Day 41 (of practicing every day, it takes some people less, some more!) when my arms were starting to get stronger. The other issue is blisters, I didn't have that problem initially since I didn't have very strong arms, I couldn't go that fast\hard so my hands were able to toughen up slowly. If you do have good arm strength, then take it easy at first as you could get blisters and you need to let them heal. Only after about 50 days I started to get blisters but that's only because I could go harder and faster. I found practicing 10-15 minutes a day was enough for first few weeks, and as you get stronger you can go for longer if you wish but stop as soon as you feel your hands getting sore. It depends from person to person on how long it takes to start getting consistent, but you could be looking at a couple of months or more, and daily practice really helps. Also, with thinner spindles you are more prone to blisters as more chance your hands may rub together.
Also spend time ensuring any sharp bits or notches or bumps are smoothed off your spindle, as these can give you blisters.
It is best to stop as soon as you feel your hands getting sore, as a blister can put you out of action for a couple of days.
3 - Hand position. I' think it may help me to have my leading hand angled more downwards and other hand angled more upwards - I've also found this doesn't tire my arms as much as opposed to the natural position of my hands being parallel to the ground but I can't say whether this makes that much difference. I find I can apply more pressure with my hands slightly angled. This also comes into play with floating hands technique where you continually change angle of hands at end of each stroke . Floating hands isn't necessary when learning but it is a great skill to learn as it opens up more possibilities for wood combinations and choices and may not be as tiring for warming up the set (I still haven't learnt it.) There are quite a few tutorials online for floating hands.
It is also recommended to have your fingers together and to try and use as much of your hands as possible - this is one area I need to improve upon.
Fi4 -Woods. The type and quality of the wood are important for the hand drill. The hearth and spindle ideally to be bone dry. Pithy centred wood/plant stalks work well as the spindle (Elder, Mullein, Teasel, Mugwort) and softish wood for hearths (Clematis, Lime, Poplar) but also experiment and see what works for you, as you may find other materials work just as well for you! I prepare the set in advance. I've listed some common combinations further below. Also, starting off I found a thinner spindle easier (about 8mm at the bottom), but as you improve you may be able to use larger thickness spindle. With thinner spindles, you will get more rotations but the spindle may eat through the hearth too quickly. Also, an issue with thinner spindles is that they can cause blisters easier than thicker spindles, as your hands can rub together The spindle needs to be as straight as possible, kinks can affect the spin and affect the amount of downward pressure.
One time I was using a spindle with a kink which hadn't been an issue and I had been having success with the spindle, but as the spindle became shorter the kink started to have an affect on the spindle. One day I just couldn't get an ember and the spindle kept popping out as if I couldn't apply enough pressure so I looked at the kink and noticed how much more pronounced it was now the spindle was shorter. I swapped the spindle and within 2 passes of the new spindle , an ember had been coaxed!
4 - Technique. As with Bow Drill, hand drill technique can differ from person to person. I have been told some conflicting advice. Some prefer a longer spindle, some shorter. Some have said keep arms at right angle, but another expert has said to have elbows down so you can pull down and apply more friction so that needs a longer spindle. Some prefer thinner spindle , some wider (12mm) - a thinner spindle is easier, it gets harder with wider spindles. But most do say try to use the whole of your hand for spinning.
The key though is applying enough downward pressure and spinning in a consistent steady rhythmic motion to generate dust and heat and once you have a nice pile of dust touching the base of the spindle then start to increase pressure and then speed if needed. As always it's about experimenting and practising and seeing what works for you. Find your way!
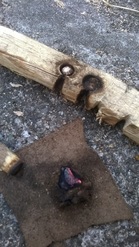
5 - Hearth Board - your hearth board will need to be thinner than used in Bow Drill as the spindle is thinner so typically a little bit deeper as the spindle is wide (e.g. 10mm ). Having a good 1/8th pie slice notch is important with the hand drill. If the hearth is too thick then it will take longer to fill up the notch with dust and ignite it; so with hand drill it's easier if you have a thinner hearth board.
It's also good to pay attention to the notch as that can make a big difference with the hand drill. Ensure you have a good V notch and it can help to flare it outwards to help with airflow. As you get deeper with the spindle, it can help to thin out the divot at the top and widen it to lessen friction on the side of the spindle. Carving a channel on the underside of the hearth from the notch to the opposite side of the hearth can help with airflow (also called Venturi notch - see posts by NW Primate on Youtube and Instagram.) Sometimes just tweaking the notch can make a huge difference I find!
It's also good to pay attention to the notch as that can make a big difference with the hand drill. Ensure you have a good V notch and it can help to flare it outwards to help with airflow. As you get deeper with the spindle, it can help to thin out the divot at the top and widen it to lessen friction on the side of the spindle. Carving a channel on the underside of the hearth from the notch to the opposite side of the hearth can help with airflow (also called Venturi notch - see posts by NW Primate on Youtube and Instagram.) Sometimes just tweaking the notch can make a huge difference I find!
|
|
In this video I demonstrate how to use hand drill host spindles.
|
Secret short-cuts to hand drill success!
You may come across various websites offering a secret miraculous hand drill tip which you may need to pay for - don't bother! Here are some listed, some may help but none will replace the fact that you need to practice and hone your technique and choose the right materials!
A good tip not mentioned is doing it with others - you DON'T have to do it on your own!! There is no prize in suffering to coax an ember using Hand Drill. And if using in ritual then do involve others.
a) spitting on your hands - this can aid grip and I do spit on my hands!. Leaving the bark on the spindle (apart from the bottom end) can help too! but leaving bark on can also give you blisters!
b) putting sand\grit in the hole - this can help if the hole\spindle has become polished. Using the tip of a knife to scratch up the hole and rubbing the spindle against a stone also works. This also indicates you aren't applying enough pressure so you may want to experiment with your stance as this can affect downward pressure.
c) changing your position to get more weight over the spindle e.g. using kneeling position or bow drill stance - as I have found - this can really help.
d) using thumb loops - tying a piece of string to the top with loops at each end and placing your thumbs in the loops. This stops your hands moving down the spindles and helps apply more pressure. These can help, but they can also take some time to get used to.
e) leaving the bark on the spindle - I do this and I find it helps with grip especially with a wood like elder as it can be too smooth without bark on - you just need to scrape the bark off the last couple of inches at the bottom, as leaving it on can hinder the process. But beware if it is very rough as it can give you blisters so you may need to smooth it off a little.
f) filling the pithy hole (e.g. in Elder) with pieces of wood - don't do this ! Pith is actually good for the hand drill!
g) flaring the notch and widening the hole at the top to allow increased air flow - as mentioned above this can make a difference. Other's also recommend resting the hearth board on thin sticks or wrapping twine around the board to raise it off the floor slightly to increase airflow under the board (I've not tried this yet)
If you are getting lots of dust and smoke but no ember then sometimes it's good to stop and review your setup and even if it's just a guess try something different rather than plow on and wreck your hands! It can sometimes make a huge difference and sometimes just having a break for 5 minutes helps. There have been a few times I've started to get frustrated as I have lots of dust and there is smoke but that ember will not ignite, so I've stopped and tried something which usually works!
I also find that the end goal of an ember can at times become detrimental to your learning as you can get so focussed on the end goal, there is a danger of just ploughing on regardless, you start to get tired, and you can get sloppy and worse, wreck your hands with blisters. If that ember is evading you, whatever you try, then sometimes it's best just to stop! Have a think about what may be going wrong but come back to it another day. And if your materials aren't working then just wait until you can find some better ones. The last thing you want to do is injure your hands!
But also remember, it comes down to gaining knowledge and practice, practice, practice! Practicing a little (even just 15mins) every day can really help. It took our ancestors thousands of years to learn to create fire, so do remember that :)
And what works for others doesn't always work for me, and what works for me may not work for you, it's about finding the technique which works best for you - there is no one way! And also practice with others - taking turns!
|
Hand Drill in Action
This is a short video of me practicing the hand drill from March 2021 using a host spindle , with Elder insert on Clematis. In 2021, I finally feel that I have made friends with the hand drill and it isn't such a struggle anymore:) The bow drill stance along with the longer spindles seems to work well for me. |
|
In the early days , you may not get any heat, dust, smoke or any sort of progress for quite a while - just concentrate on practicing the method and conditioning your hands and arms. You don't really need to worry too much about the woods in the early stages, but a little smoke does help the motivation!
Wood Combinations
These are common combinations that have worked for people in the UK, but don't just stick to these - experiment :) Wild Clematis does seem to work well for the hearth board but can be difficult to find in some areas. Look for Tarzan type vines hanging down from trees. Softer \ pithy woods and woody plant stalks seem to work best for the hand drill spindle.
I have had success with these combinations:
•Elder\ Willow \ Teasel \ Ragwort \ Mullein on wild clematis (vitalba)
It's best to harvest Teasel \ Ragwort \ Mullein after they have seeded and started to die off and dry and store for future use.
Clematis works really well as a hearth but other soft woods can work too such as Lime and Poplar.
Other people recommend Ivy and Willow for the hearthboard but I struggle with these although I have had some success.
Other people have used the below combinations successfully - I haven't tried these yet. There are various plants with pithy stalks you can try - some may be too fragile.
•Mugwort on clematis
Cat tail (bulrush) on clematis
•Burdock on clematis;
•Willow on willow
